
Quick Answer
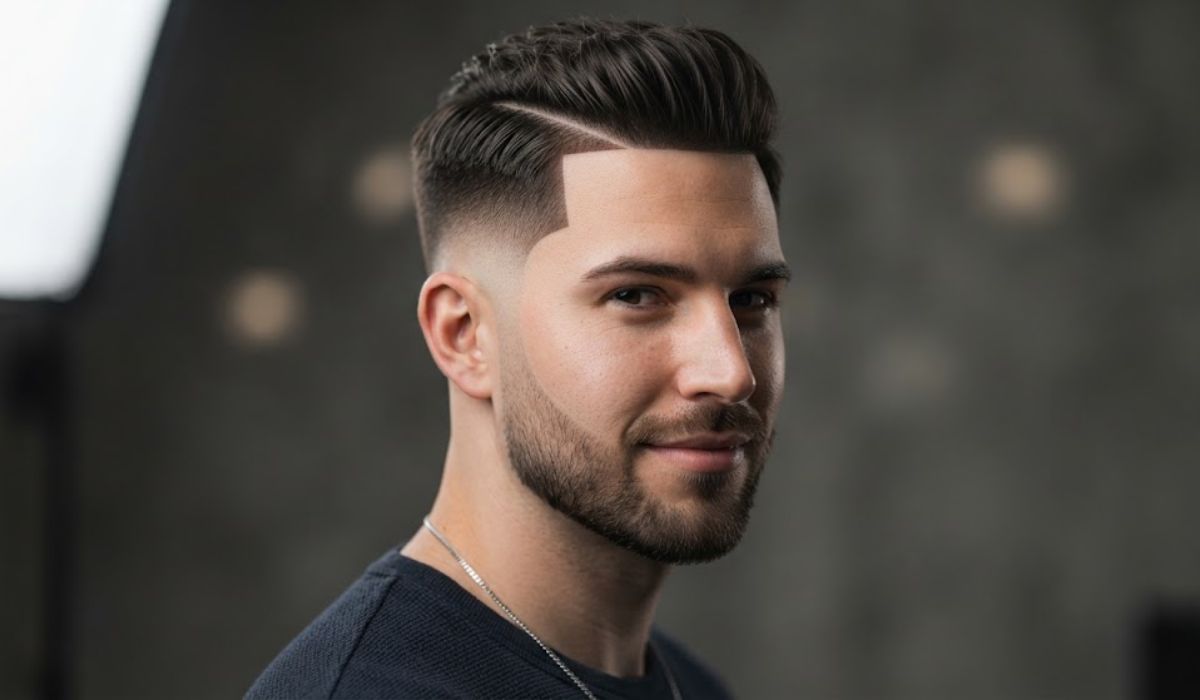
A burst fade side part haircut combines a side parted top with a burst fade that curves around the ear. The top stays noticeably longer while the hair around the ear becomes progressively shorter, creating a clean contrast without removing as much length from the entire side of the head.
The main choices are the fade height, top length, part style and finish. A low burst keeps more weight on the sides, while a mid or higher burst creates a stronger contrast. You can also choose between a natural part and a barber defined hard part.
TL;DR
- Burst fade side part haircuts combine a curved fade around the ear with longer hair styled toward one side.
- Low, mid and high describe how high the faded area rises and how much side weight remains.
- A natural side part follows the hair’s existing separation, while a hard part uses a defined line.
- The most useful barber instructions specify the fade height, shortest length, top length, part type and rear finish.
- A reference photo is especially useful because haircut terminology can vary between barbers.
What Is a Burst Fade Side Part Haircut?
A burst fade side part haircut is a combination of two distinct elements. The burst fade creates a rounded fade around the ear, while the side part separates the longer hair on top and directs it toward one side.
Unlike a fade that removes hair evenly across the entire side of the head, a burst fade concentrates the shortest transition around the ear. More length can remain toward the crown and rear, giving the haircut its distinctive shape.
The side part then adds structure to the longer top. It can look polished and traditional when combed neatly, or more relaxed when the top is textured and allowed to move naturally.
What Makes It a Burst Fade?
The defining feature is the curved fade around the ear. The shortest hair sits close to the ear and gradually becomes longer as the fade moves away from that area.
The exact height and amount of scalp exposure can vary. That is why two haircuts can both be called burst fades while looking noticeably different.
What Makes It a Side Part?
The top hair is separated toward one side instead of being pushed straight back or left entirely forward. The separation can be subtle and natural or deliberately emphasized with a defined part line.
The part does not have to be shaved into the hair. A natural separation can create a clean side part without a visible razor line.
Burst Fade Side Part Haircuts to Consider
The best way to compare these haircuts is to look at the features that actually change the result. The following variations are more useful than a long list of nearly identical styles.
Classic Burst Fade Side Part
The classic version keeps enough length on top for a clearly visible side part while using a moderate burst fade around the ear. The top can be combed neatly for a traditional finish or given some texture for a more relaxed appearance.
This version is a useful starting point if you want the defining shape of a burst fade without an extremely dramatic fade.
Low Burst Fade Side Part
A low burst fade side part keeps more weight above and around the sides. The fade remains concentrated lower around the ear, so the overall haircut can appear more conservative and less exposed.
This option can work well when you want the burst shape to remain visible without making the fade the dominant feature of the haircut.
Mid Burst Fade Side Part
A mid burst fade side part moves the transition higher around the side of the head. The increased contrast makes the fade easier to notice while still leaving substantial length on top for the side part.
If you are unsure between a subtle and more noticeable fade, comparing a low version with a mid version using reference photographs can make the difference much easier to understand.
High Burst Fade Side Part
A higher burst fade removes more weight from the upper side area. The result has stronger contrast between the longer top and the shorter sides.
This version creates a more pronounced haircut shape, so it is especially useful to show your barber a reference photograph rather than relying only on the phrase “high burst fade.”
Skin or Shadow Burst Fade Side Part
The finish also changes the appearance. A skin finish creates a very short transition with greater scalp visibility, while a shadow finish leaves slightly more visual density.
The choice is less about the name of the haircut and more about how much contrast and scalp exposure you want around the ear.
Burst Fade With a Hard Part
A hard part adds a clearly defined line to the side part. The line gives the haircut stronger separation and makes the direction of the top immediately visible.
Because the line becomes less sharp as the hair grows, a hard part generally requires more attention if you want the original definition to remain visible.
Burst Fade Side Part With a Longer Top
Keeping additional length on top creates more styling possibilities. You can comb the hair across, add volume, create a smoother finish or introduce texture.
The longer the top becomes, the more important it is to consider natural growth direction and how much daily styling you are willing to do.
Textured or Wavy Burst Fade Side Part
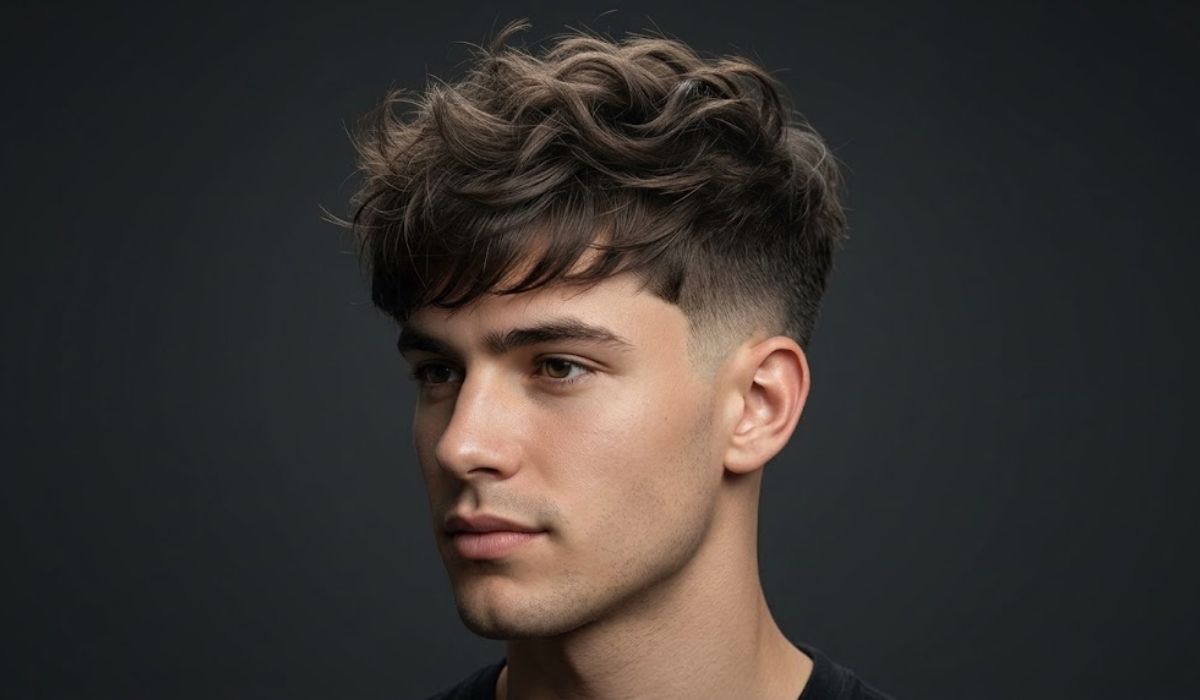
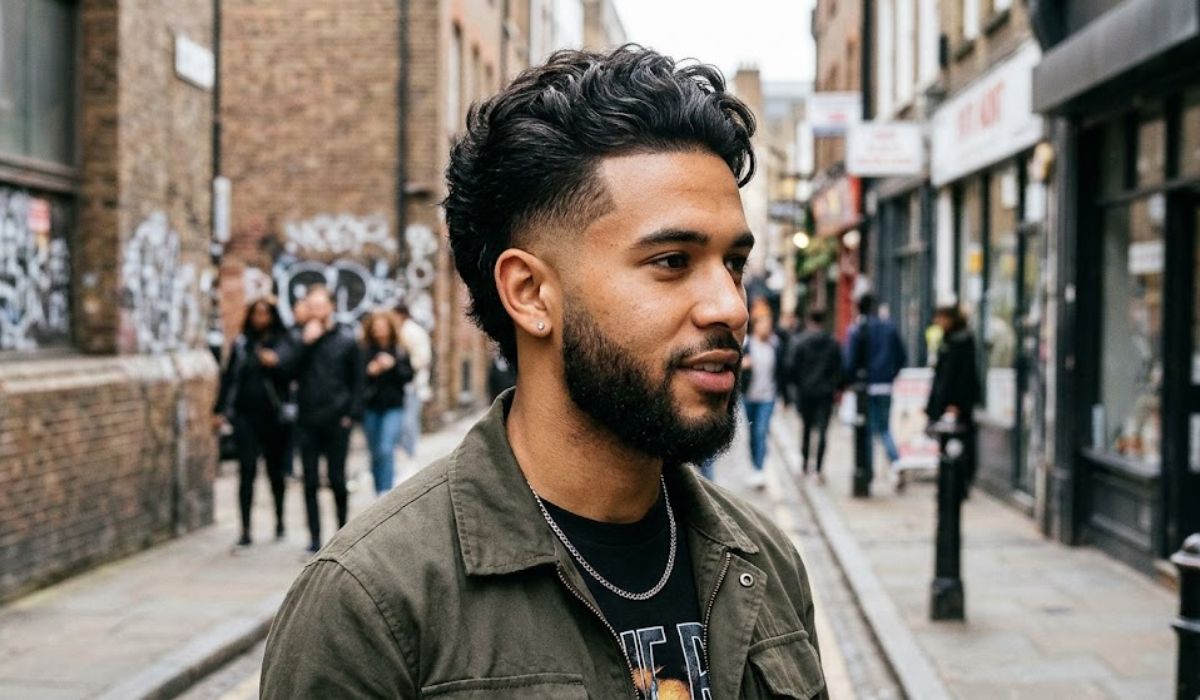
Texture can make the side part look less rigid. Wavy hair can create natural movement across the top, while straighter hair can produce a cleaner and more defined separation.
The same fade can therefore look quite different depending on density, texture and the direction in which the top naturally grows.
Low vs Mid vs High Burst Fade Side Part
The fade height is one of the most important decisions because it changes how much weight remains on the sides. The labels are useful, but exact placement can vary between barbers, so photographs are a better reference than terminology alone.
| Version | Visual effect | Best described as |
|---|---|---|
| Low | More side weight remains | Subtle and balanced |
| Mid | More noticeable contrast | Balanced with stronger definition |
| High | More upper side weight is removed | Stronger and more pronounced |
There is no universal measurement that makes every barber use these terms in exactly the same way. The practical solution is simple: tell the barber the general height you want and show a photograph that demonstrates the exact result.
Low Burst Fade Side Part
Choose a low placement when you want the longer side area to remain visually prominent. The side part stays the main styling feature while the fade provides a cleaner outline around the ear.
Mid Burst Fade Side Part
Choose a mid placement when you want the fade to have a stronger visual role. The difference between the longer top and shorter sides becomes more obvious without requiring the most aggressive fade placement.
High Burst Fade Side Part
Choose a high placement when you prefer stronger contrast and less weight on the upper side. This can make the top appear more prominent because the surrounding hair is shorter.
Natural Part vs Hard Part
The side part itself can be created in two noticeably different ways.
| Feature | Natural part | Hard part |
|---|---|---|
| Separation | Follows the hair’s natural direction | Uses a barber defined line |
| Appearance | More subtle | More pronounced |
| Styling | Usually more flexible | More structured |
| Upkeep | Grows out more naturally | Defined line needs regular maintenance |
Natural Side Part
A natural part works with the direction in which the hair already separates. It can be particularly useful if you want a polished haircut without a visible line cut into the scalp.
Hard Side Part
A hard part creates a deliberate visual boundary between the two sections of the top. It can make a classic burst fade side part look sharper, but the line becomes less defined as the hair grows.
If you are uncertain, a natural part is the simpler request. You can always discuss adding a defined line with your barber.
How to Choose the Right Burst Fade Side Part
Instead of choosing a haircut name alone, decide on five practical variables.
- Fade height: Decide whether you want a low, mid or higher transition.
- Top length: Decide how much hair you want available for side part styling.
- Part type: Choose a natural separation or a clearly defined hard part.
- Fade finish: Decide whether you prefer more scalp visibility or a softer shadow appearance.
- Styling level: Consider whether you want a neat combed finish or a more textured result.
Hair texture and growth direction also matter. A haircut photograph can show your barber the shape you want, but the barber can adjust the top length and transition to suit the way your hair actually grows.
What to Tell Your Barber
Avoid relying on the haircut name alone. A more useful barber request identifies the parts that control the final shape.
- Describe the fade height. Say whether you want the fade low, mid or higher.
- Describe the shortest finish. Explain whether you want a softer shadow appearance or a very short finish.
- Explain the top length. Tell the barber how much length you want to keep for the side part.
- Choose the part. Say whether you want the natural part or a defined hard part.
- Show a reference photo. Use an image that clearly shows the side and top rather than relying on terminology alone.
A useful request could be as simple as: “I want a burst fade around the ear, keep enough length on top for a side part, and use a natural part.” Then show your reference photograph and discuss the exact fade height with the barber.
If you want a stronger line, replace the natural part request with a hard part request. If you want less contrast, discuss a lower fade and a softer finish.
How to Style a Burst Fade Side Part
The styling process depends on how polished or relaxed you want the top to look. The basic goal is to establish the side separation and then direct the longer hair toward the chosen side.
- Start with damp hair. Remove excess water without completely drying the top.
- Establish the part. Use your natural separation or the defined part created by your barber.
- Direct the top. Comb or brush the longer section toward the chosen side.
- Add your preferred styling product. Use enough to control the hair without making the finish unnecessarily heavy.
- Set the shape. Use a comb for a cleaner finish or your fingers for more texture.
For a Clean Finish
Keep the top controlled and direct the hair consistently across the part. A comb creates a more defined appearance, especially when the top is relatively straight.
For a Textured Finish
Use less rigid styling and allow some natural movement through the top. Wavy or textured hair can make the side part look less formal while retaining the structure of the haircut.
Burst Fade Side Part vs Similar Haircuts
Fade terminology can become confusing because several haircuts can look similar from one angle. The location and direction of the fade are more useful than the name alone.
Burst Fade vs Drop Fade
| Feature | Burst fade | Drop fade |
|---|---|---|
| Main shape | Curves around the ear | Falls lower as it travels around the head |
| Visual focus | Concentrated around the ear | Creates a descending transition around the head |
| Side part compatibility | Works naturally with a side parted top | Can also be paired with a side part |
The biggest visual distinction is the path of the fade. A burst fade is recognizable by its rounded concentration around the ear, while a drop fade follows a descending path.
Burst Fade vs Burst Taper
These names can overlap in casual haircut discussions, but the intended result can differ. A burst fade generally creates a more noticeable faded area around the ear, while a burst taper typically preserves more surrounding length.
If the distinction matters for your haircut, show the barber the desired reference image and ask how the requested finish will be interpreted in that barbershop.
How to Maintain a Burst Fade Side Part
The faded area changes as the hair grows, so the sharpest version of the haircut will not remain identical indefinitely. The side part also becomes less defined when the top gains additional length.
Maintenance depends on how precise you want the fade and part to remain. Instead of following a universal schedule, pay attention to when the curved fade loses its shape or when the side part no longer sits the way you want.
- Keep the fade edges clean if you prefer a sharp appearance.
- Maintain the part if you have chosen a hard defined line.
- Trim the top when its extra length begins to make styling difficult.
- Use a reference photo when asking for the same shape again.
There is no single maintenance interval that applies to everyone. Hair growth rate, desired sharpness and preferred top length all affect when another barber visit makes sense.
Common Mistakes to Avoid
Choosing a Fade Height Without Seeing an Example
The words low, mid and high can be interpreted differently. A reference image reduces the chance of receiving a shape that is technically described correctly but visually different from what you expected.
Leaving the Top Too Short for the Desired Part
A side part needs enough length to establish a clear direction. If the top is cut too short, the part may become difficult to style or less visible than intended.
Assuming a Hard Part Is Necessary
A side part can look defined without a shaved line. If you prefer a softer appearance, ask the barber to work with your natural separation.
Showing Only a Front View
The burst fade is especially important around the side and ear. A photograph showing the side view gives the barber more useful information than a front facing image alone.
Using the Haircut Name Without Explaining the Finish
“Burst fade side part” still leaves several decisions open. Specify the fade height, top length, part type and finish to make the request clearer.
Frequently Asked Questions
What is a burst fade side part haircut?
A burst fade side part haircut combines a side parted longer top with a curved fade around the ear. The fade creates the burst shape while the longer top provides the part and styling direction.
What is a low burst fade side part?
A low burst fade side part keeps more weight on the sides and concentrates the fade lower around the ear. The result is generally less aggressive than a higher fade.
What is a mid burst fade side part?
A mid burst fade side part places the fade higher around the side of the head, creating more visible contrast while retaining enough top length for the side part.
What should I tell my barber for a burst fade side part?
Tell the barber your preferred fade height, shortest finish, top length, part type and rear finish. Bring a clear reference photograph so the intended shape is easier to understand.
Should I choose a natural or hard side part?
Choose a natural part if you want the separation to follow your existing hair direction. Choose a hard part if you want a clearly defined line and stronger visual separation.
Is a burst fade the same as a drop fade?
No. A burst fade is concentrated in a curved pattern around the ear, while a drop fade follows a descending path around the head. Both can be combined with a side part.
How do you style a burst fade side part?
Establish the part while the hair is damp, direct the longer top toward one side and use a suitable styling product to control the desired finish. A comb gives more definition, while finger styling creates more texture.
Can a burst fade side part work with curly or wavy hair?
Yes, the same general haircut can be adapted to textured hair. The amount of top length and styling required will depend on the hair’s texture, density and natural growth direction.
How long should the top be?
There is no single required length. The top should retain enough length for the side part and the finish you want, with the final length adjusted to your hair and styling preferences.
How often should a burst fade side part be maintained?
Maintenance depends on how sharp you want the fade and part to remain. Return to the barber when the fade loses its shape or the top becomes difficult to style.
Key Takeaways
- Burst fade side part haircuts combine a curved fade around the ear with longer hair directed toward one side.
- The biggest visual decision is the fade height. Low keeps more side weight, while mid and high placements create progressively stronger contrast.
- A natural part follows the hair’s existing separation, while a hard part creates a deliberate line.
- The haircut name alone does not communicate every detail. Specify the fade height, top length, shortest finish and part style.
- Use a reference photograph, especially when discussing low, mid or high placement.
- The most useful approach is to choose the haircut based on the shape and finish you actually want rather than selecting a name alone.

Hi, I’m Tomy Parker, a tattoo enthusiast and content writer at Tattosyle.com. I love exploring tattoo styles, meanings, placement ideas, aftercare tips, and the latest trends in body art. My goal is to create easy-to-understand, helpful, and accurate guides that inspire both first-time tattoo lovers and experienced collectors. Through Tattosyle, I aim to help you make informed decisions and discover tattoo designs that reflect your unique personality and story.
Leave a Reply